Monster
Hunter Rise by developer and publisher Capcom—Nintendo Switch Beginner's Guide written by Richard.Estimated reading time: 20 minutes
Hello aspiring Hunters, are you here for
the classroom portion of your hunting test? Well thanks for swinging by! With
the recent release of Monster Hunter Rise, we thought it would be a good idea
to put together a little Beginner's Guide to Monster Hunter. My credentials?
Over 4,000 hours and about 16 years of familiarity with the franchise. Don't
let that worry you though, this is more of a lite introduction on how the game
works, so that experience isn't needed to get into Rise. If you haven't
already, feel free to check out my review for Rise.
Now,
let's get into it!
What is Monster Hunter?
How does Monster Hunter work? In a
nutshell, you will be embarking on quests from the guild to deal with the local
overgrown wildlife, do some pest control, or collect items for those not tough
enough to brave the wilds. The main focus is dealing with the large and
dangerous creatures that roam the wilds outside town. Hunting the titular
Monsters, as it were. Thanks to a slew of quality-of-life improvements debuting
in Rise, there is little hassle regarding quest details. If you're starting
now, you definitely picked a good time! Quest progression will follow a fairly
simple pattern: select a quest, choose a weapon, eat for status increase,
depart on quest, hunt the Monster, and then collect your sweet rewards. Pretty
simple, right? Let's start by taking a look at what weapon to bring along.
Weapon Type
When you start up a new game, you will be
equipped with a default weapon. In Rise this is a Long Sword. Immediately after
gaining control of your hunter, you’ll see you have one of every weapon type
available in your equipment box. Which weapon should you bring? There's no real
right or wrong answer to this question; it is entirely personal preference.
Every weapon is just as viable as the next, so there is no real wrong choice.
What weapon you should bring is what weapon you WANT to bring. As a new hunter in
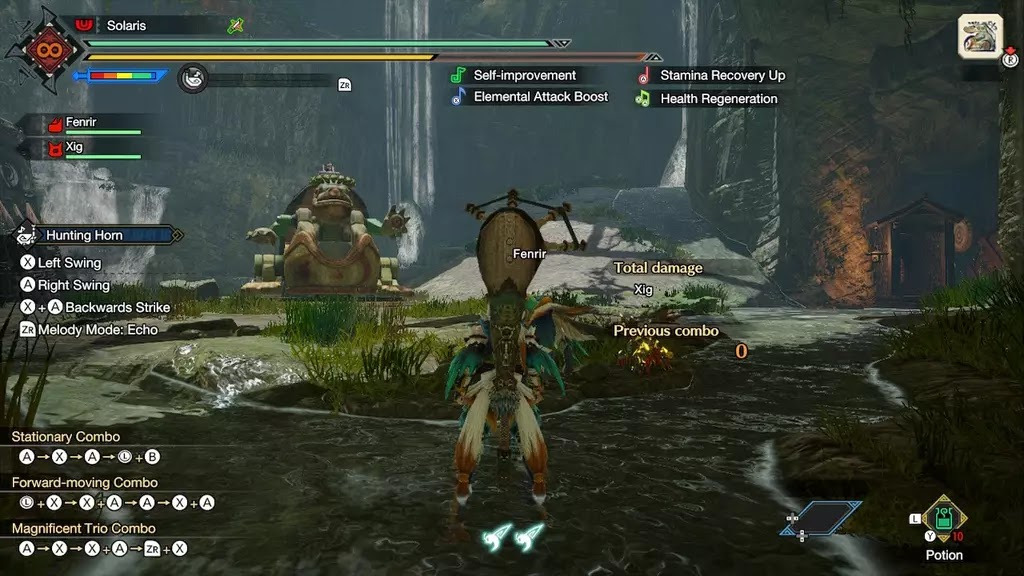
Rise, you will want to head to the training area accessed for the first time
through the town’s Buddy Plaza. There you’ll find an equipment box to change
weapons. In the training area, the game will display the weapon’s button
controls and some combos to help familiarize you with the system.
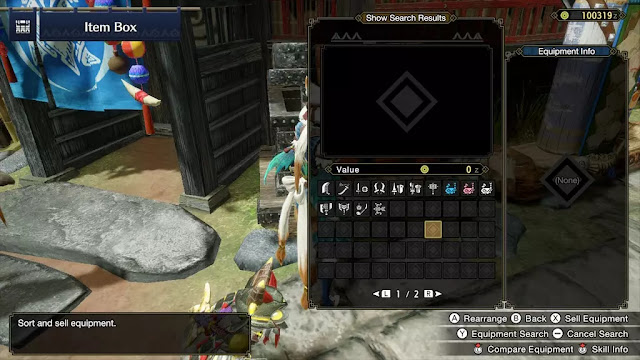
You can also check all the moves for a
weapon in your hunter notes, so you don't need to worry about forgetting the
weapon combos before you learn them. It is important to note that the attack
value listed is raw damage value, and NOT a DPS value. Choosing a weapon simply
because it has a high number usually doesn't end well.
There are a few different categories that
each of the 14 weapon types slot into: heavy, light, ranged, and defensive.
This is more of a loose terminology, since some weapons cover multiple
categories.
●
Heavy weapons are slow to wield,
but deal higher damage per swing. The Hammer, Great Sword, Switch Axe and
Hunting Horn are your big heavies. They require commitment to any given attack,
taking the time to learn the Monster’s patterns to deliver massive damage when
the window presents itself.
●
Light weapons are quicker to
swing, but deal less damage per hit. Getting more hits in allows for more
opportunity to build up status and elemental damage, depending on the
properties of the weapon. Sword & Shield, Dual Blades, Insect Glaive and
Long Sword are your main light weapons.
●
Ranged weapons allow you to hit a
Monster from further away using a variety of ammunition type. The Heavy Bowgun,
Light Bowgun and Bow are your ranged options.
●
Defensive weapons allow you to
stand your ground against Monster attacks and then retaliate. Lance, Gunlance
and Charge Blade all use shields to let you know they’re your defensive picks.
You’ll be able to find a variety of
in-depth weapon tutorial videos, but when you’re trying to learn, they can get
overwhelming. Once you've done a number of quests and grown accustomed to your
weapon, you can check out the tutorials to learn more of nuance available with
each weapon.
Weapon Selection for your
Quest
In order to choose a weapon that's right
for the quest, it's important to know what the monster is weak to so you can
bring a weapon that takes advantage of that weakness. Taking a look at weapon
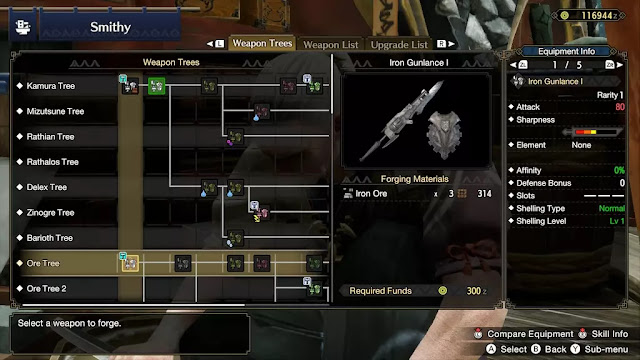
stats can provide an example of what you want to consider. The key take-aways
are:
●
Attack
●
Sharpness
●
Affinity
●
Element or Status damage
Weapon attack is exactly what you expect:
raw damage value. Bigger doesn't always mean better, but is generally desired
for most weapon types. Sharpness is represented as a gauge with different
colors (red, orange, yellow, green, blue, white) and provides a damage modifier
for each hit you make. Sharpness also allows you to bypass some of a Monster’s
defense, so your attacks don’t bounce off their hides causing your Hunter to
flinch. If your Sharpness gets too low, you will need to sharpen your weapon
with a Whetstone. Affinity is your weapon’s critical hit chance. A critical hit
will deal more damage on that hit, and be accentuated with a red/pink effect on
the screen. If your weapon has a negative Affinity, you have a chance to deal
less damage on a hit, which will be accompanied by a purple/black screen
effect. Element or status on some weapons allow for bonus damage or status
effects on each attack. Some weapons won’t have any element or status effect,
while some rare weapons can have both.
Element values are damage of that type
applied to a Monster. Some Monsters are weak to certain elements and resistant
to others. As you craft more weapons with different elements, you'll want to
pay more attention to this stat. Most of the heavy weapon types, such as the
Hammer, Hunting Horn, or Great Sword, don't rely on element damage, whereas
Light weapons like the Dual Blades or Sword & Shield are able to rack up elemental
damage quickly. Because of this, you’ll want to match your Light weapon’s
element attack to a Monster’s weakness while a Heavy weapon won’t notice much
of an impact to damage numbers. Once you’ve defeated a monster once, you’ll be
able to check its elemental resistances in your Hunter’s Notes and exploit the
weaknesses on future hunts!
Status damage works like elemental damage
in that it provides a bonus effect to each hit and has a weakness/resistance
system per Monster. Hits from a weapon with a Status value will fill an
invisible meter. Once it reaches the peak, the Monster is affected by the
Status effect. Each Monster has its own weaknesses and strengths to each of the
available Status effects, and some Monsters will try to use these Status effects
on you! A poison-using Monster like the Great Wroggi can still be affected by
poison, but the effect won’t last as long as it would on one weak to poison.
There are more aspects to weapons that will unlock as you progress into the
game, but for your first hunts, this is what you should be concerned with.
Bringing a thunder element weapon to a Rathian fight for instance is a good
idea. Bringing a fire weapon? Not so much.
Food
You’ve gotta eat to live, and Monster
Hunter shows why this is true. Eating has always been an integral part in the
franchise, and Rise has simplified the matter. Whenever you go to eat at the
Dango store, you will get a boost to your maximum health and stamina, as well
as the possibility of gaining the effects associated with the Dango you chose.
Never hunt on an empty stomach! New to Rise, a symbol will pop up next to your
quest description after accepting, indicating if you've eaten. If you forget to
eat before embarking on a quest, you can still eat in the field, thankfully. I
remember the good old days when me and the lads got prepped to fight a Monster
and then had to immediately abandon the quest because someone forgot to eat.
Item Loadouts
In Monster Hunter you have a wide variety
of items you can take with you into battle. Everyone will have a different role
they like to play, so your item loadout will differ from person to person. I've
included a shot of my personal loadout for reference, but you don't need to
follow that if you don't want to. What should you almost always have with you?
First up are Potions and Mega-Potions. These are your main healing, and can be
made really easy. Herbs can be crafted into Potions (they are also available in
the town shop), and mixing Honey with a Potion in the crafting menu makes a
Mega-Potion. The next items are the stamina-increasing Rations and Well-done
Steak. These increase your available stamina up to the maximum limit. During a
quest, your maximum stamina will decrease over time, and you’ll need to eat to
regain the maximum. The lost stamina is indicated by a red empty bar behind
your stamina gauge. Eating Dango before a hunt will increase your maximum
stamina a little, remember, but you can raise it even more with Rations!
Antidotes are a great item to bring with you when Hunting a Monster with Poison
attacks!

Traps aren't required on all Hunts
(unless the quest goal is to Capture the Monster), but are handy for new and
experienced Hunters alike because they provide an opportunity to either catch a
weakened Monster to end the quest, or provide some free time to wail on a
Monster with all you've got. The Tranq Bombs are for capturing a trapped
Monster, which will be covered in the Combat Tips section of this Guide. The
last two items you see are Powercharm and Armorcharm, and provide an increase
in attack and defense ratings, respectively. These will be purchasable from the
shop after certain in-game progression has been met. Other optional items to
take could include: Flash Bombs for blinding monsters or dropping them out of
the air, Nulberries to get rid of any blights you may get, Lifepowder to heal
teammates if you're playing online, and Bombs for blowing up monsters if they
are asleep or in a trap. In addition to the items you bring, you can also grab
temporary items from the supply box at the beginning camp when you start a
quest. There isn't any reason not to take these, so go right ahead, but
anything with “EZ” or the First Aid Med will be returned at the end of the
quest. If you're playing online, don't take all the items unless your friends
or teammates offer. Don't be that guy.
Know the Area
Monster Hunter Rise offers large open
maps for you to explore and Hunt in, and knowing how to get around easily in
the area will benefit you more and more as time goes on. Your map will make
note of any environmental hazards, locations of Herbs, Honey, Endemic Life, Ore
deposits and other key harvestables, but it helps to learn how to find these in
a pinch as well. This is even more important now that Rise has introduced
vertical movement, since the in-game Map isn’t the best at showing elevation at
a glance. Remember to put down Great Wire Bugs on Jewel Lilies and explore to
make future hunts easier. Know how to get back up to areas if you get knocked
off a cliff or down a pit, and where there is any handy Endemic Life nearby.
Vigorwasps are bugs with a floating green sack and provide a burst of healing
when attacked or activated. Wirebugs give you a temporary extra Wirebug charge.
Thankfully the days where you had to track the Monster, throw a paintball at
it, and then hope the tracking paint doesn't wear off while the Monster is
running away are long gone. Your map will track known Large Monster position.
Some monsters also change the elements on their attacks based on where you
fight. For instance, monsters that throw rocks will have elements attached to
the rocks based on locale.
Combat Tips/Capturing
Fighting style will vary from weapon to
weapon, and based on personal preference, so let me just give a few tips and
pointers here. Have you noticed your attacks are bouncing off a Monster’s hide
and causing you to flinch? Remember to keep your Sharpness up by using a
Whetstone while the Monster is changing areas, fatigued, or focused on another
Hunter. Monsters will enter an enraged state at certain thresholds. During this
time, the Monster will typically be more aggressive and hit much harder. The
enraged state typically begins with a loud roar, and some monsters will change
their appearance slightly. After a time in this state, a Monster will calm down
and return to normal. Don't be scared to run away from a Monster. If you're at
low health or a Monster is enraged, it's perfectly fine to book it to a safe location
to heal and take stock of yourself. A good example of a monster you should do
this with is the Tigrex. When it gets angry, it hurts and just won't stop.

Capturing a Monster is a good way to end
a Hunt without needing to completely drain a Monster’s health. When a Monster
can be captured, a blue icon will appear under the Monster’s photo in the top
right of the screen. You may also see the Monster limping away if it tries to
change locations while capture-able. Normally a limping Monster will head off
to its nest to sleep. During this time, you can drop a trap and throw two Tranq
Bombs at the creature to capture it. When should you capture versus slay
though? Drop rates for different parts vary based on hunting method. Some parts
you can only carve off of a slain Monster, and some are only available from
capture rewards. Check the Large Monster section of the Hunter’s Notes for drop
tables if you need a reference.
Learning a Monster’s attack animation
tells can help you to avoid attacks. If you’re swinging wildly and not watching
the Monster, don’t expect things to always turn out in your favor. If you’re
using a weapon with longer animations, be sure to time them so you won't get
knocked upside the face for your attempt. The new Wirefall is a move that can
help get you back up and either away from a Monster or back into a fight, but
can lead you to getting hit multiple times by an attack since it cancels your
invulnerability time. Sometimes after getting hit, it can be best to stay on
the ground a moment while a Monster’s attack finishes. Once you have some
experience under your belt, you can style on the Monster and use the Switch’s
video capture to save the memory.
Know your positioning in a fight.
Monsters will take different damage on different body parts. Some parts take
more damage from Cutting weapons like a Monster’s tail, while the head is more
vulnerable to Blunt damage. Each Monster’s entry in the Hunter’s Notes has a
chart which tracks which body parts are more durable, which parts take more
elemental damage, and which parts can be broken or severed. Part breaks cause a
Monster to flinch and provide more rewards at the end of the quest! When
playing online with others, typical etiquette is to have Blunt damage weapons
like the Hammer attack the head, while Cutting type weapons focus on the tail.
This way you can get KOs, part breaks and not hit your allies with your
attacks. While you can’t damage a teammate with your attacks, you can make them
flinch.
Crafting Gear
Now that you've successfully Hunted some
creatures, it's time to turn them into pants! I've done a brief summary of
weapons statistics, so let's take a look at armor. Armour is easier to
understand, as it has a raw defense value, elemental resistance value, and
skills attached to each piece of armor. Yes, you can mix and match, but I
suggest sticking to a full set until you’re more comfortable with the game. In
Rise, having multiple pieces from the same armor set equipped offers a small
increase to all of your elemental resistances. The defense rating is your main
area of concern, but it helps to be aware of your elemental weaknesses and
resistances. If your current equipped set has a negative to fire resistance,
you’re going to take more damage from a fireball attack.
On the flip side, if you have a high
enough elemental resistance, you can take less damage and even gain immunity to
some blight side effects. Your armor’s skills are what you are here for after
defense. These skills provide in-battle bonuses for the Hunter. Most sets are
geared for a specific playstyle, so just because that armor set looks fancy and
has good defense, doesn't mean you want all those Bowgun skills when you're
using the Dual Blades. Skills shouldn't take precedence over defense for new
Hunters, but they can help to form your play style. Crafting armor at the
Smithy takes a number of Monster parts and cash, so you may need to hunt a
number of Monsters before you can craft your gear. Upgrading and forging
weapons works on a similar basis. Don't forget that you can upgrade armor,
which you should do if you have the resources. Upgrading increasing an armor
piece’s defense stat.
Exploring Kamura Village
In Rise, there's a bunch of stuff to do
in town and you shouldn't be neglecting it. Be sure to talk to everybody.
People will give you quests that will generally result in something useful for
you, such as better Dango effects or more Great Wirebugs. If you open the fast
travel menu, if an area has someone who wants to talk to you, there will be an
icon on the list. Next, in the Buddy Plaza, there is a tree you can climb with
a nest at the top. Your Cohoot will collect an item after each quest and store
up to five quests worth in the nest. Be sure to take advantage of the
facilities in the Buddy Plaza. The Meowcenaries allows you to send idle
Palicoes and Palimutes on their own side adventure to collect various items for
you. Some items used in crafting can only be found using this system (indicated
in Rise with sparkles in the Meowcenaries menu).
When crafter gear for your Hunter, don’t
forget your Palico and Palimute! While I haven't really mentioned your furry
friends too much, they require weapon and armor as well. Don't neglect them! Go
visit the Buddy Smithy to get them geared up! Dressing up your cat and dog are
one of the main draws of the series. Lastly, be sure to visit the Merchant
often. Sometimes they will have a sale, cutting the price of goods in half and
open up the Merchant’s Lottery for some more free items. This will be indicated
by a music change and a nearby Felyne doing advertising.
General Tips
A few things hunters should know to make
life easier.
- You can cook Raw Meat and turn it into Well-done Steak by using
the BBQ. There is both a visual colour change, as well as a song to note
when to finish cooking. Well-done steak is useful for restoring stamina.
The Motley Mix in the Dango Shop for turning any Raw Meat into Well-Done
Steaks in bulk, which can save time as well.
- Village
quests are easier than Gathering Hub quests. Be prepared for stuff to be
tougher in the Hub missions. While High Rank is exclusive to the Hub
quests, it is a good idea to familiarize yourself using the Village quests
first.
- Don't make a
weapon/armor just because you have the materials. This is a good way to
run out of money fast. Not to mention those parts might be needed for
other weapons or armor. Think before you make.
- Endemic Life
and Hunting Helpers are there for your benefit. Use them, simple as that.
They can help turn the tide of battle in your favor!
- Your Palico
and Palimute are your lifelines in the early game, and can really make a
difference late game. The dogs are for mobility, the cats are for support
and skills. I highly suggest to bring one of each along. When playing
online with others you only get one instead of two, and while it's hard to
beat the mobility of the Palimute, don't be scared to try the Palico. Once
you have more of the map unlocked and explored, you can travel faster
without needing to ride your Palimute.
- If a Monster
is asleep, it takes double damage from the hit that wakes it up. Use bombs
or a powerful blow when a Monster is sleeping for major damage. It can
help to stack bombs, even if that isn’t the damage you want to be doubled.
The Monster isn’t moving while it’s asleep and this is prime time to use
that to your advantage.
- Check the
in-game notes and tips. They're there to help. While they may be a little
overwhelming for the newcomers, a lot of what you need is right there in
the manual.
- If you're
hurting for money, go on a harvest tour via the expeditions, collect a
bunch of stuff, preferably rocks, and sell them. You probably won't need
this in low rank, but harvest locations respawn approximately every four
minutes, so getting money isn't too hard.
- Don't be
afraid to abandon a quest. If you have two faints in under two minutes,
chances are the hunt isn't going well. You can choose to abandon from the
start menu, and all your consumed items will be returned to you. There is
nothing shameful in backing out to try again. Even I still do this if a
Monster is just being particularly awful, or things just are going too
poorly.
- Remember your hunting etiquette for online play: Don't attack
those who are carving, know your location to attack, don't run off to mine
and leave your teammates to do all the work, send your teammates likes if
they did a good job (you get free items for lots of likes), and don't use
your teammates as lures unless they're your friends and are ok with it.
Wrap-up
That's it for the beginner's guide. While
there is a bunch I haven't talked about, this is stuff that will usually come
around either in High Rank, where you'll no longer be a newbie, or is more
advanced than what you should be concerned about at the moment. If you have any
questions, throw them down in the comments section and I'll try and answer them
when I’m able to! Hope this makes your first Hunting experience a little better
than mine way back in the day.
Happy
Hunting!