Estimated reading time: 10 minutes
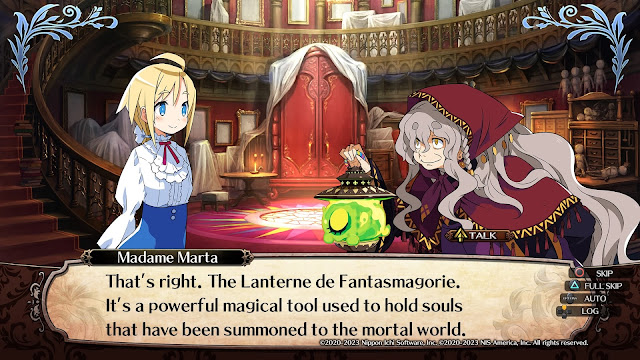
Labyrinth of Galleria tells the tale of a sprawling labyrinth hiding beneath Galleria manor. Within its walls are hidden precious Curios: items that are cursed and have mysterious powers. As a young girl Eureka comes to take up a hired help position at the manor. She is entered into the service of a witch hired by the baron who owns the manor. Eureka's task is to act as a medium to a soul planted within a magical lantern. You, who technically take on the role of the soul, are tasked with taking puppet soldiers into the labyrinth in order to combat the fierce creatures within and to recover the relics.
Now, if you've played Labyrinth of Refrain, then you've already got a good idea of what's in store for you. If not, have no fear, we'll be going over things. Briefly though, as there's actually quite a lot involved in these titles. Good news for you dungeon crawler aficionados! Encounters in the labyrinth are not random! Enemy icons appear on the map and you walk into them in order to start a fight. Walking into them from the side or back will generally result in a battle start in your favour. First up, let's take a look at how you go about exploring the labyrinth.
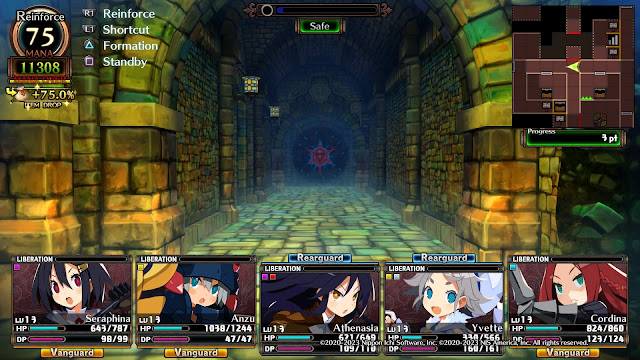
Your basic exploration is pretty standard fare. You have an empty map that fills itself in as you explore, each tile you walk over adds the info of that tile to the map. Sometimes these tiles may be hazards, such as damaging tiles, pitfalls that drop you floors, or perhaps cursed mud that damages you while you're inside it. Your goal here is, ultimately, to discover the 7 major Curios d'Arte hidden within the labyrinth. These are placed in very special looking chests that you can discover. There are also a myriad of other curios as well. Let's not forget the normal chests and items that you can discover while roaming the labyrinth.
Now obviously, if all the labyrinth had to offer was just pathways, it wouldn't be all that interesting. Well, as you progress through the game, you can unlock more and more movement techniques. This will let you get into other areas, or past hazards that you weren't able to get by previously. Pro tip, if you see some spikes/lances, you do get a move to get past them later, so make a note of where those are. Apart from movement, you also can break down dungeon walls. Yup, that's right, you can break the dungeon. While most walls get repaired upon returning to the labyrinth, certain walls don't, allowing for quicker access to areas. You can also unlock other abilities, like a fog wall that prevents enemy icons from spotting you, although you still can get into combat, or the ability to stockpile exp.
Most active abilities will require you to use reinforcement points. These points start at a default of 100, and will reduce each time you use an active ability. Reinforcement points can be recovered by earning mana in the labyrinth. Either touching a glowing green orb or wall will give you mana, as well as replenish reinforcement points at a certain rate. Be careful though, as each floor of the labyrinth has a mana limit. Exceed this, and some of the enemies get...well, scary. If any of you are coming from Refrain, I'm sure you have minor PTSD from the reapers. Or blowing up your first wall and getting demolished by the enemy behind it. Yeah, 25 hours later and they're some of the stronger enemies you can come across. Either way, collecting mana, as well as pretty much any item you see, is still really useful. When you return to base, you also get bonus exp. Once you unlock it, I do suggest playing with stockpiling exp, as it can be very useful.
So, how are you going to deal with the baddies infesting the labyrinth? Well, that's where the handy puppet soldiers come into play! You can create units with a combination of a soul and some puppet parts. You get to choose a class, nature, stance, lucky number, name, starting skill, as well as growth type. Fun fact: everything I listed actually affects something about your unit. Well, at least in Refrain it did, and it's implied it does so in Galleria as well. Yup, even the name. I won't go into the specifics, otherwise this will turn into a four hour lecture on just the basics, but feel free to play around with what you want from your puppets. If you really want, you can always check out a beginner's guide to unit creation for Refrain, provided one isn't available for Galleria when you're reading this. It'll go more in depth.
So, let's say you've created your unit and decided upon what you want of them. It's now time to put them in a coven! How Galleria works is that all your units get placed in covens, of which you can have five covens in your squad. Each coven has different passive effects and exp acquisition rates, so pay attention when assigning, or reassigning, your units. For example, there is a coven type that has one frontline position and multiple support positions, with a 120% exp rate for the front liners, but it can only be used by theatrical star units. These types of covens are pretty plentiful, especially once you get later into the game, so you will want to take a look at new covens you acquire.
This brings us to another facet of the coven: Donum. This is basically just palette swapped mana/spells, but essentially any spells you can use are predominantly tied to the coven, rather than the units themselves. Some Donum require certain slots in the coven to be filled, while others may just be in-battle usage restrictions. Important to note however, is that coven actually may require reinforcement points to use. Covens earn exp and will level up based on number of battles mostly, and their cost will reduce as they level, as well as possibly opening up more Donum slots, which you can learn through manuals you can collect.
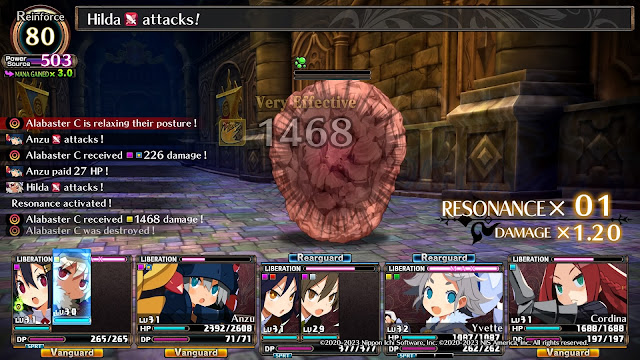
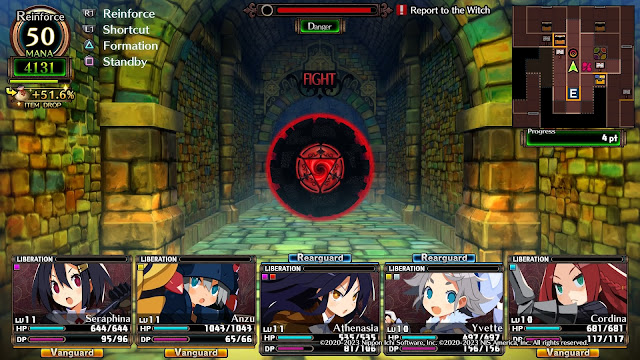
Alrighty, now that you have your squad ready to go, it's time to take on the labyrinth! What better way to get used to this than to fight an enemy! Or group of enemies, maybe. Walk into an enemy icon, or interact with certain event markers, and you get into a fight. So, there's a lot going on, and I swear it gets easier the more time goes on, so bear with me for a bit. So to start with, you've got a turn based battle system, with higher AGI characters moving sooner. At the start of every "round", you will give directions to your units, adjust whether they are in the vanguard or rearguard, as well as spend reinforcement points as needed. Commands for the units are fairly straightforward, as you can attack, fortify (guard), use Donum, or attempt to flee. Adjusting whether your units are in the front or back is important because every weapon has a certain range value that needs to be met to use efficiently. If you're outside the range, your damage output decreases. Also, certain combinations of vanguard and rearguard coven positions will activate formation bonuses, so make sure to shuffle your covens to get the maximum effectiveness out of them!
While it's still on your turn, you can use reinforcement points for different bonuses. These are unlocked through witch petitions mostly, which I'll talk about a bit later, but are explained to you when you acquire them in-game as well. As an example, you can spend 1 reinforcement point to increase attack of a unit in a coven for the turn, up to three times. Using items is also considered a "special move" and needs reinforcement points to function. Once you've set out all your commands, it's time to begin battle. Now, how enemies and your units react to battle situations are rather similar, so I'll be lumping them together. All units have varying degrees of resistance and damage types. Some attacks might be more effective against certain enemies. As you attack enemies, you also build up a "secret art" gauge. When full you can unleash it. This is based on coven, so if you don't like it, consider changing covens. Different status effects can be applied to both your allies and enemies, of which there is an in-game tutorial on how they work.
One of the more unique aspects of Refrain and Galleria, and the bane of my existence in Refrain, is "Critical Gore". Basically, as puppets, your units aren't as attached to their limbs as you'd think. Enemies, and allies, have a chance at hitting a critical gore, meaning the character or unit hit loses that body part. This comes with a massive amount of damage, an decrease in stats and max health, and the inability to use any equipment associated with that limb. For your own units, you must then repair the puppet either with a specific item, or by returning from the labyrinth and repairing them at the workbench. Be warned though, as losing the head means your unit is just plain out of commission until repaired. The last thing I think I should mention here is that all units have a stun gauge. Attacks will drain this, and once emptied, the character will be stunned for that turn, but recover at the start of the next round.
Alright, that covers most of the primary gameplay aspects, so let's talk about a few things you can do outside of exploration. First up, and I can't stress this enough, CHECK THE TUTORIALS SECTION. This will be periodically updated with sometimes very important info with little to no indication. Seriously, just check it every so often. Additionally, there are messages written on the walls of the labyrinth. Most of the time, these are helpful tutorials or hints, so you may want to read them. When you return from your expeditions, there are a number of facilities at your disposal. You can take on requests by delivering loot items for rewards, check out the alchemy cauldron to enhance gear or release sealed equipment. Additionally, you can spend some of that mana you've brought back in order to petition the resident witch to unlock something new for you.
Now, if any of you have been paying attention to the release info, or the pictures in this review, it may come as no surprise when I say this is a NIS title. What this means is that you can expect a pretty engaging story, anime stylized visuals for character portraits and cut-scenes, as well as a lengthy grind and occasionally bull*#$t enemies. Also some really dark themes tossed around like they're popcorn and a really bangin sound track.
My only real complaints about Galleria are: sometimes navigating menus can be really annoying to find what you're looking for, and the fact that you can be brutally punished for having poor luck, both in-game and as a player. The amount of times I've been doing well then been screwed over by a few really unfortunate gore attacks... blegh. That being said, despite how much Galleria, and Refrain by extension, frustrated me to no end, I absolutely love them. If you're a dungeon crawler fan, you'll definitely enjoy Labyrinth of Galleria.
Summary
Overall, Labyrinth of Galleria: The Moon Society, is a great addition to any dungeon crawler lover's library. With a surprisingly in-depth system for those looking for it, an interesting view on labyrinth exploration, and engaging characters and story, it's a gripping tale all through. While it may be a little much for newcomers to the genre, it's still a lot of fun. No need to know the previous title also means you can jump right on in.
Score: 8 / 10




0 comments:
Post a Comment